Enable HTTPS
Quick Overview
-
Prepare self-signed or 3rd party certificate.
-
Use ChangeProtocol tool in order to switch to HTTPS protocol.
Step by step guide
-
Open ChangeProtocol.exe tool by navigating to the Tools folder in the installation directory
Note:by default is located at C:\Program Files\OPSWAT\MetaDefender Vault\Tools -
Run the tool on the machine where MetaDefender Vault is installed
-
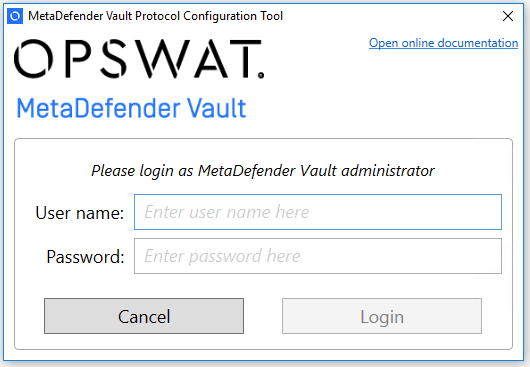
Provide login details for the local administrator account and click Login
-
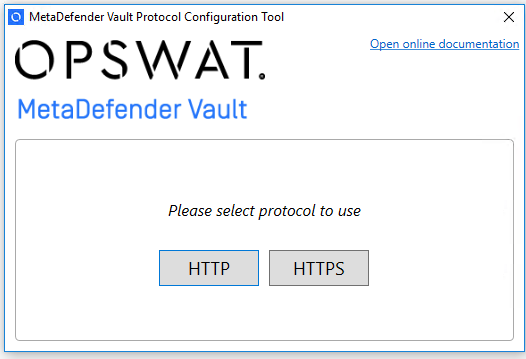
Select HTTPS protocol
-
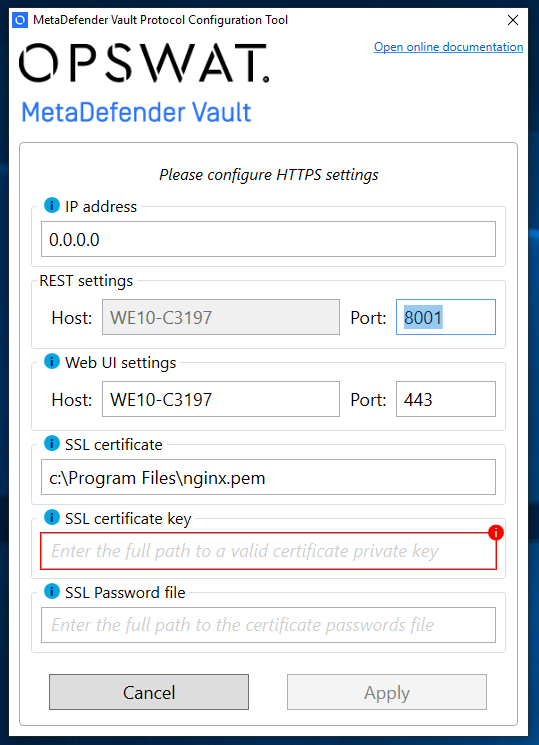
Refer to Information regarding certificates in order to obtain the certificate and the certificate key
-
Fill the desired settings in the configuration window. Note that you can find more information about each field below.
-
The table below describes in detail each setting
Name
Description
Example
IP address
Allows the user to limit the IP addresses that can access the Web UI
Leave 0.0.0.0 in order to set the binding to all IP addresses.0.0.0.0 → allow unrestricted access
192.168.16.16 → only allow clients from this IP addressREST settings: Port
The port used for internal communication between MetaDefender Vault Services
The default value is 8000.Please note that the REST service will no longer be shared with the Web UI port.
All calls to the REST endpoints should be made through the Web UI port.Please also note that the port remains exposed to configuration for backwards
compatibility reasons but it should not be changed.Web UI settings: Host
The host name that will be used to reach your MetaDefender Vault Web UI.
Please note that this host name should be accessible inside your
network in order to allow clients to access the web portal.Please also note that this is the same value that will be used
when composing links in email notifications.files.opswat.com → users will have to type https://files.opswat.com in browser
in order to access the user interface and all links in the sent email notifications
(if you have configured SMTP) will look like:
https://files.opswat.com/file/8b822a734eea4afdaf5bcd01bfec8416A DNS settings should be previously configured to ensure clients can resolve
files.opswat.com.Web UI settings: Port
The port used to reach MetaDefender Vault Web UI and REST API endpoints.
You can leave this to the default value 443 in order for your users
not to require writing the port in the browser address bar.443 → users will have to type https://files.opswat.com in browser
in order to access the user interface
8010 → users will have to type https://files.opswat.com:8010 in browser
in order to access the user interfaceFor REST API calls
443 → in order to expose the API at https://localhost/vault_rest
8010 → in order to expose the API at https://localhost:8010/vault_restSSL certificate
The path to the SSL certificate to use.
Please refer to Information regarding certificates for more details
SSL certificate key
The path to the SSL certificate's private key.
SSL Password file
The path to the text file containing the password for the protected certificate.
-
Click Apply in order to finish this process.
The Enabling HTTPS with Metadefender Core v4 page has instructions on how to set up Metadefender Core v4 with HTTPS.
The Enabling HTTPS with Metadefender Core v3 page has instructions on how to set up Metadefender Core v3 with HTTPS.