Enable HTTPS for earlier versions
Warning
Use the steps described below in order to switch to HTTPS protocol for MetaDefender Vault (previously SFT) versions before 1.1.9
If you are using version 1.1.9 or higher please refer to 8.10 Enable HTTPS.
Quick Overview
-
Prepare self-signed or 3rd party certificate.
-
On MetaDefender Vault configuration page (Configuration → Change URL), enable HTTPS.
-
Update SFT configuration file (applicationhost.config) for https binding.
-
Open the "pp.sft.rest.service.exe.config" file and edit the 'RestHostAddress' entry value to use the HTTPS protocol (e.g., 'https://{computer_name}:8000/sft_rest').
-
Open the "config.json" file and edit the protocol to use HTTPS protocol
-
Enable HTTPS for the REST service using netsh
-
Restart sftRest & sftHelper services
The Enabling HTTPS with Metadefender Core v4 page has instructions on how to set up Metadefender Core v4 with HTTPS.
The Enabling HTTPS with Metadefender Core v3 page has instructions on how to set up Metadefender Core v3 with HTTPS.
Also, if using a self-signed certificate, you MUST follow all directions in the "Trusting local or remote self signed security certificate" section as well.
Step-by-step guide
-
Follow Information regarding certificates in order to install a certificate on the machine.
-
Open the Secure File Transfer web application and log in using an administrator account
-
From the left side menu, navigate to Configuration → Change URL
-
On the Change URL page, toggle on the HTTPS switch

-
Click on the Update button from the bottom of the Change URL page
-
Open the “<installation directory>\Config” folder (e.g., "C:\Program Files\OPSWAT\Metadefender Secure File Transfer\Config\").
-
Open the “applicationhost.config” file using Notepad.
-
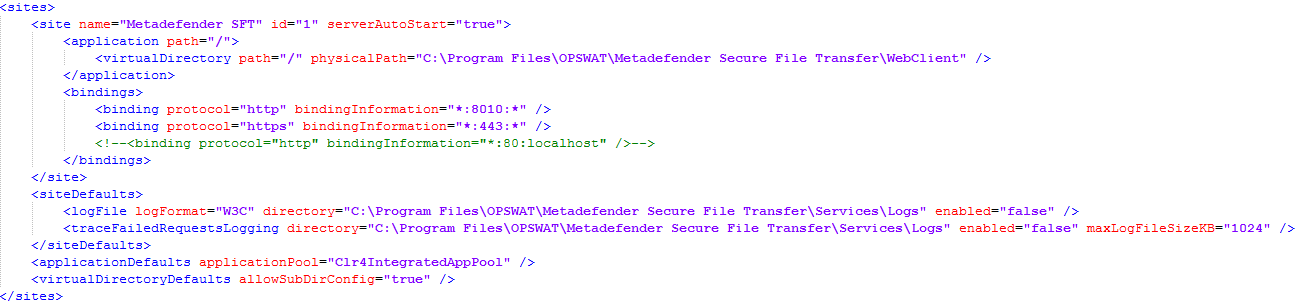
Find the “<sites>” XML tag and add the HTTPS binding to the “Metadefender SFT” website. Please see below for details:
<bindingprotocol="https"bindingInformation="*:443:*"/>Your edited binding should look similar to the one shown below:
-
Optionally, remove the HTTP binding, if you only want MetaDefender Vault to work over HTTPS.
-
Save and close the “applicationhost.config” file.
-
Open the “<installation directory>\Services>” folder (e.g. 'C:\Program Files\OPSWAT\Metadefender Secure File Transfer\Services')
-
Open the "pp.sft.rest.service.exe.config" file and edit the 'RestHostAddress' entry value to use the HTTPS protocol (e.g., 'https://{computer_name}:8000/sft_rest').

-
Save and close the "pp.sft.rest.service.exe.config" file.
-
Open the "<installation directory>\WebClient" folder (e.g. C:\Program Files\OPSWAT\Metadefender Secure File Transfer\WebClient\)
-
Open the config.json file in Notepad.
-
Change the "protocol" value to "https".
-
Leave port value unaltered (e.g. "8000"), unless the REST service listens on a different port, or you've changed the port in step #11 (e.g. 443). In this case, update the port accordingly.
-
Save and close the "config.json" file.
-
Restart the Metadefender Secure File Transfer REST Service
-
In Command Prompt, run “net stop sftREST”
-
After the service stopped, run “net start sftREST”
Note: If sftREST service can't be started, please refer to the sub-page of Troubleshooting.
-
-
Restart the Metadefender Secure File Transfer Helper Service
-
In Command Prompt, run “net stop sftHELPER”
-
After the service stopped, run “net start sftHELPER”
-
-
Test that the site works by visiting https://localhost (make sure to clear cookies or try in incognito browser)