8.9.2 Integrate with Active Directory Federation Services
Integration with Active Directory Federation Services as Single Sign-On provider is only available for AD FS servers running Windows Server 2016 AD FS or Windows Server 2019 AD FS.
Below you can find a step by step tutorial on how to integrate Active Directory Federation Services IdP with MetaDefender Vault using the OpenID Connect protocol.
-
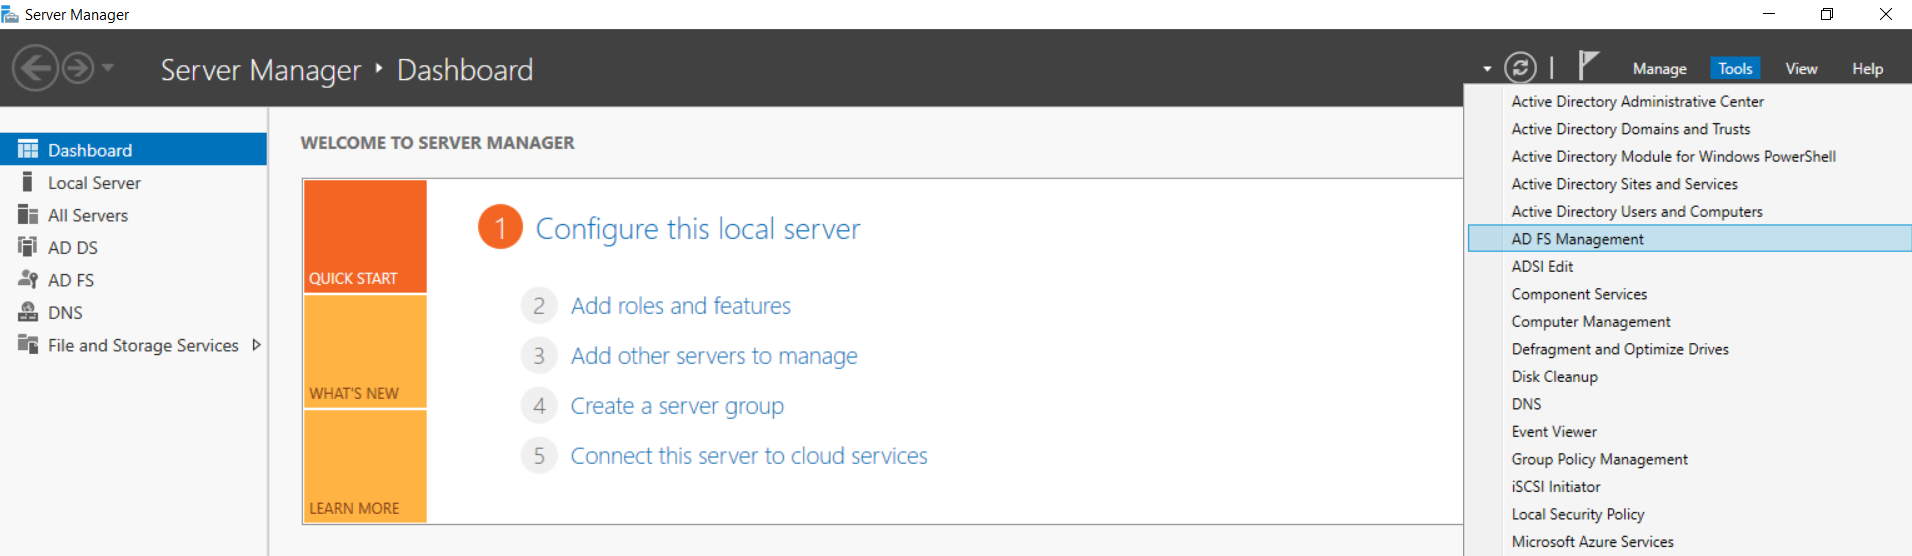
Open the Server Manager Desktop App and navigate to Tools → AD FS Management
-
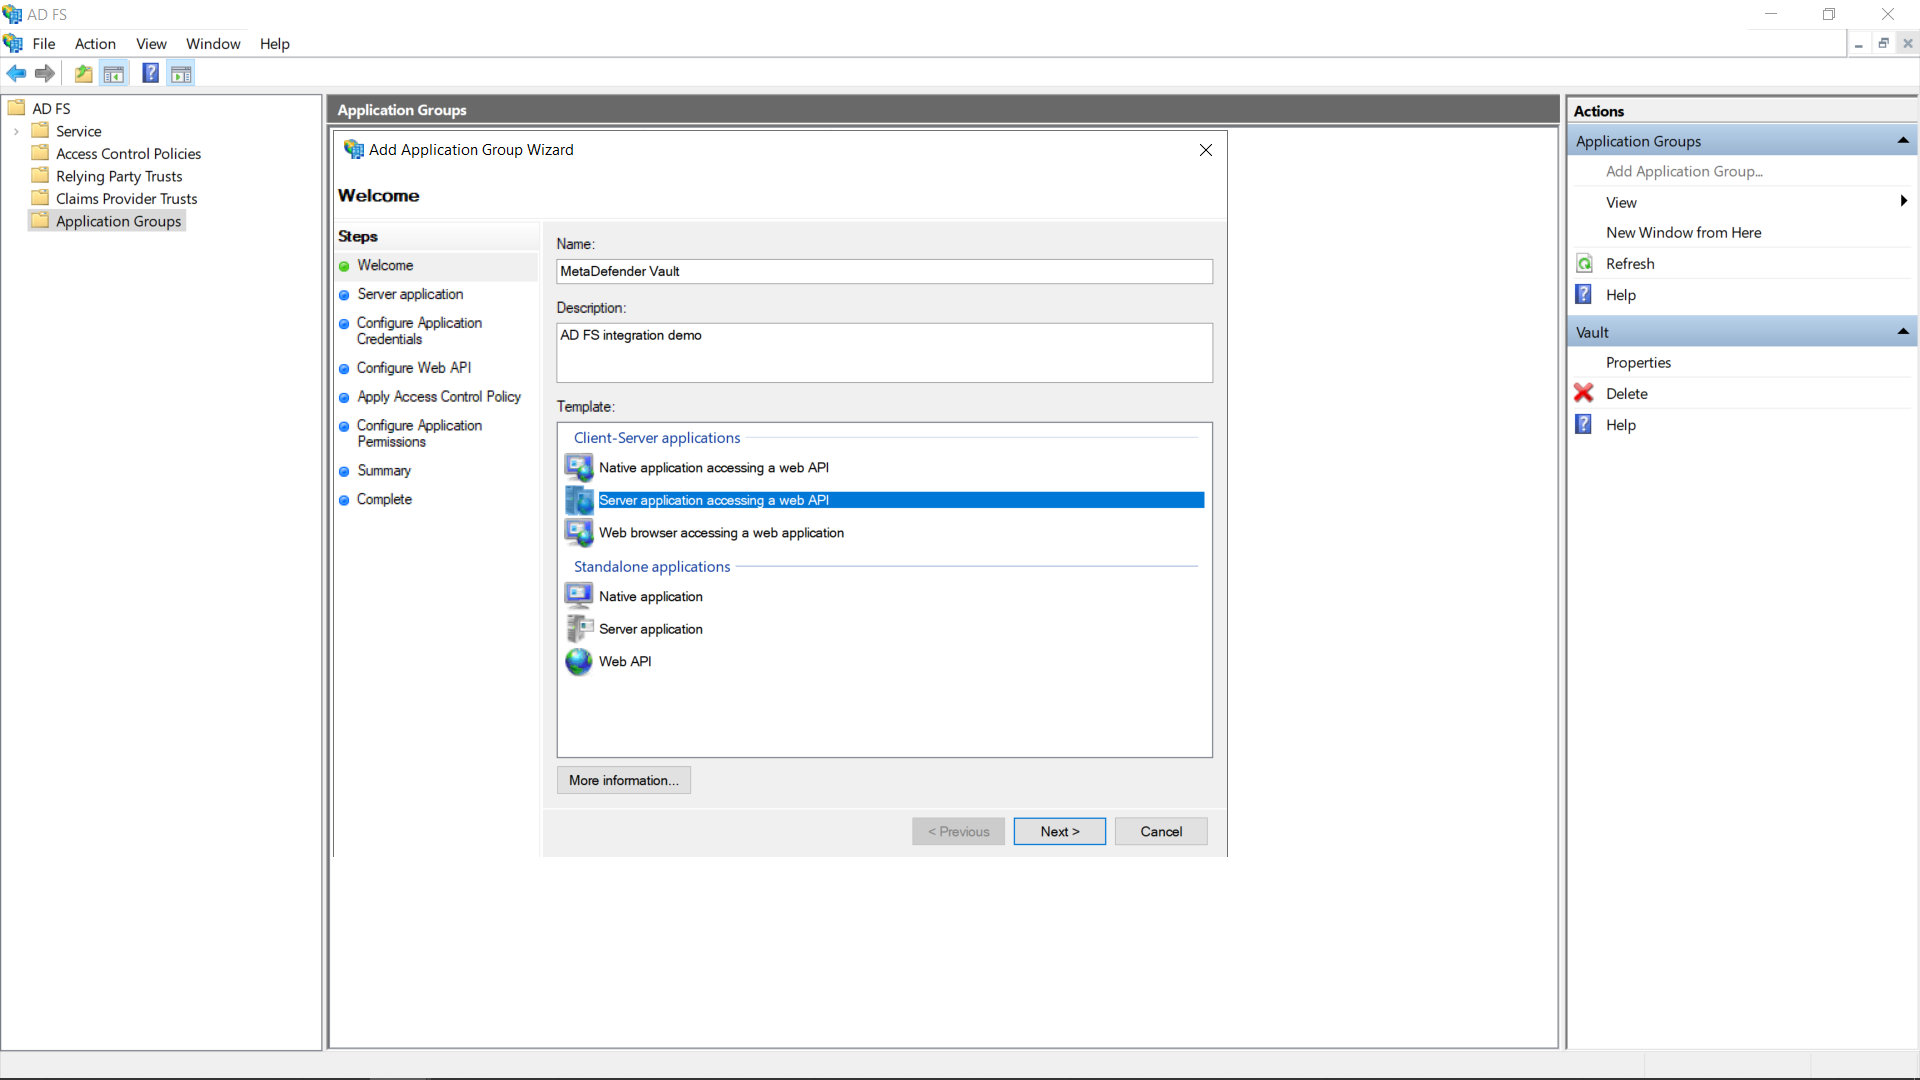
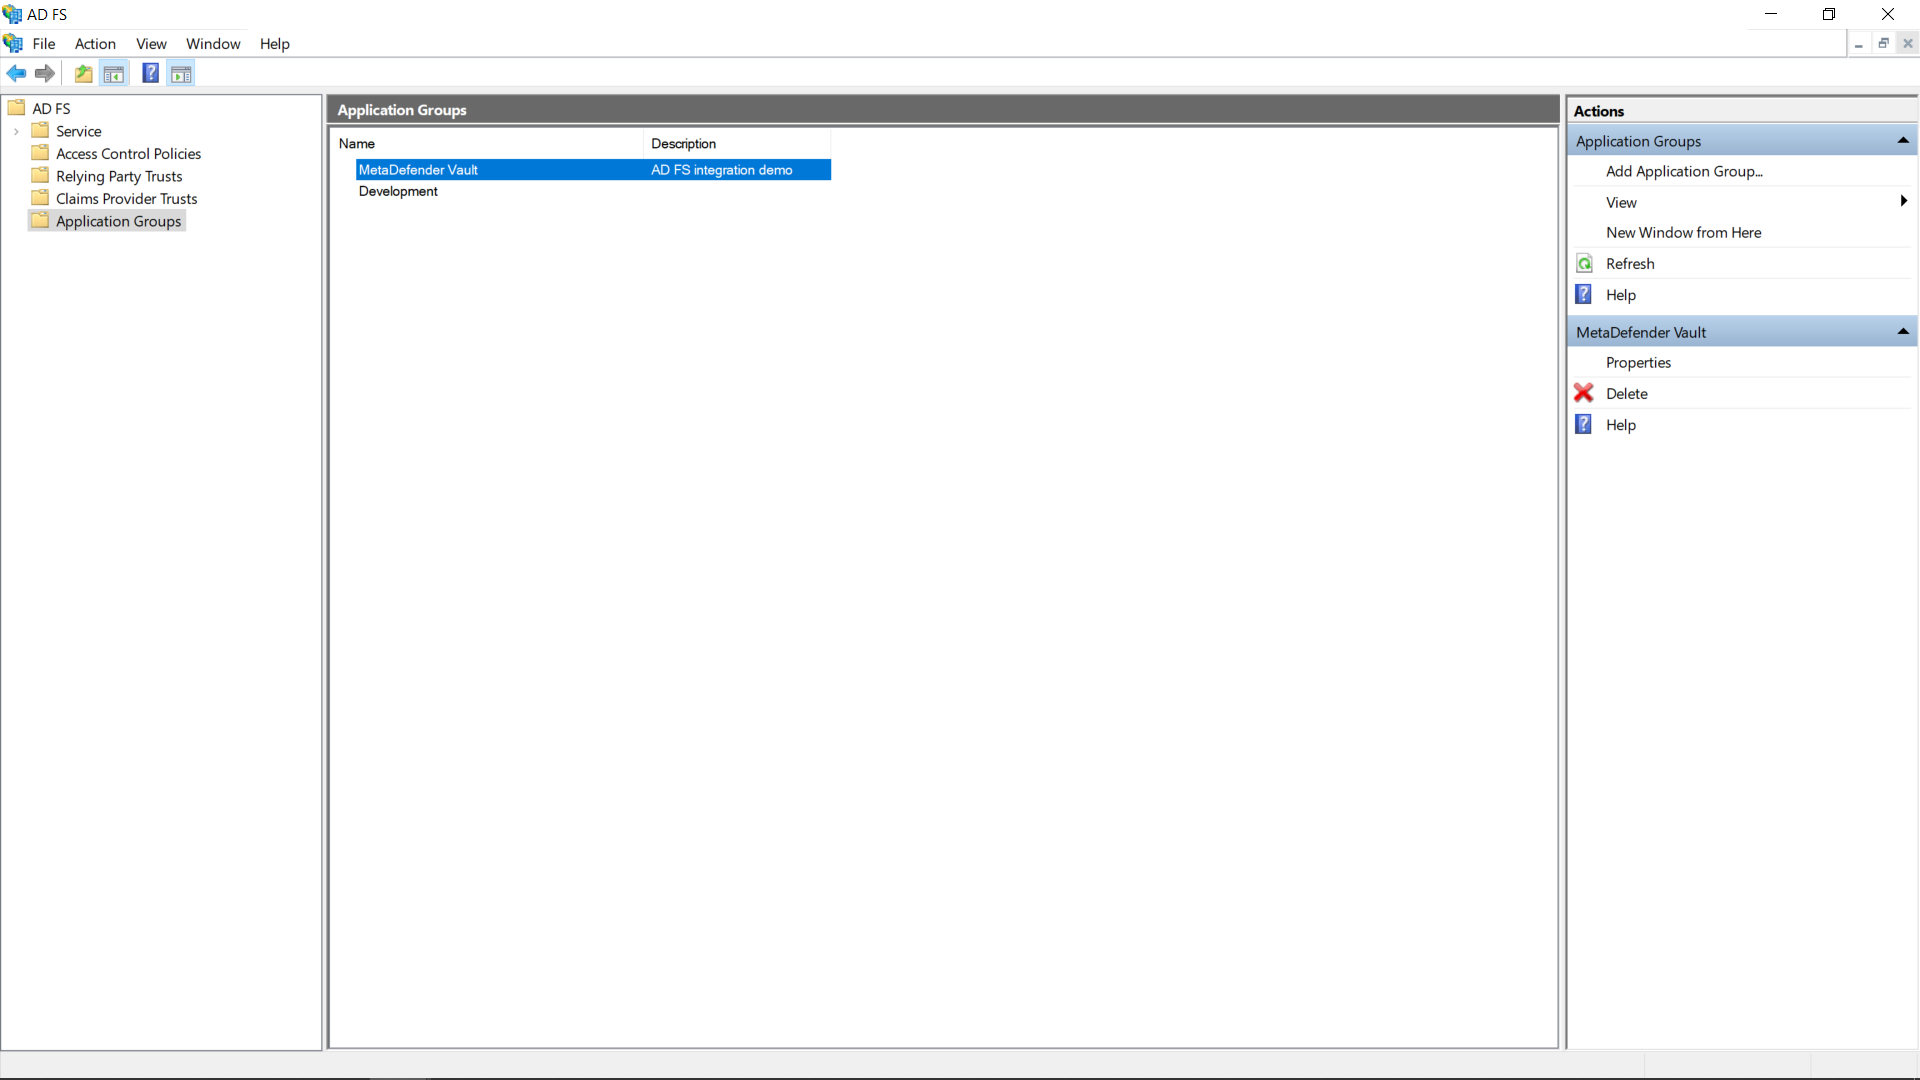
Inside the AD FS Management app navigate to Application Groups → Add Application Group
-
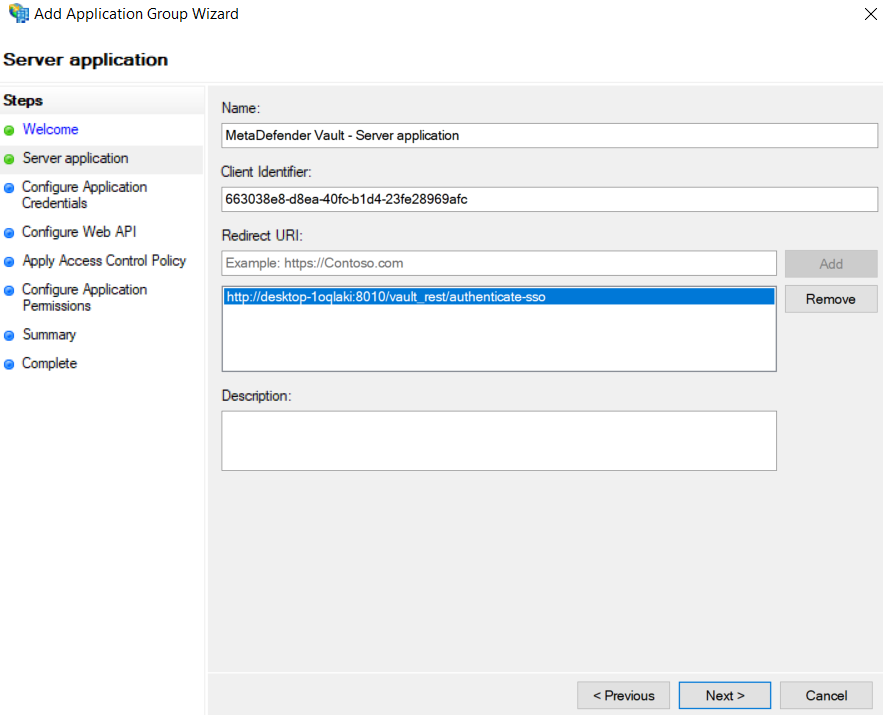
Enter a descriptive name for the application group and select the Server application accessing a web API template
-
To find the Login redirect URI
-
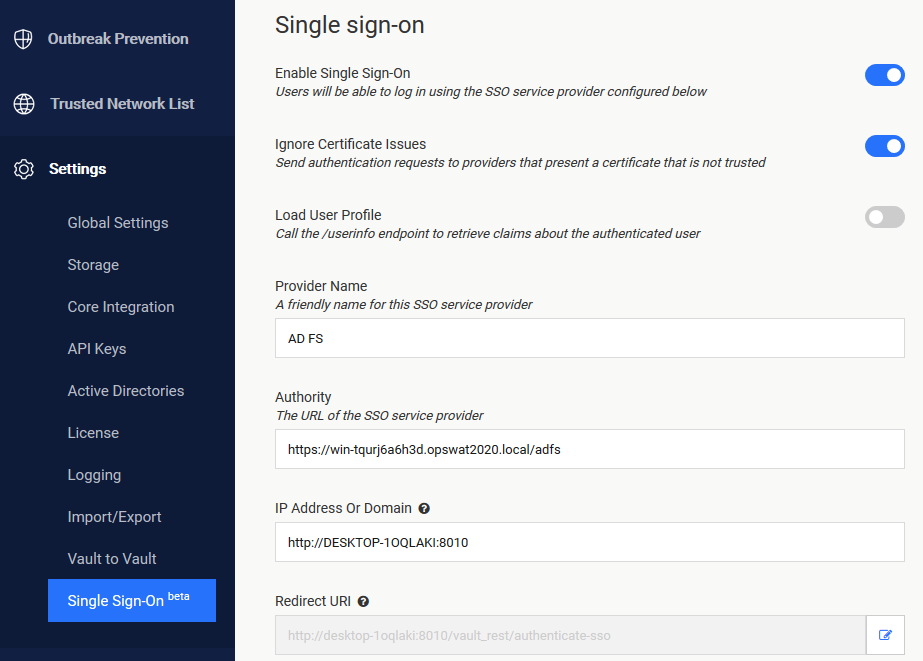
Go to MetaDefender Vault web console and navigate to Settings → Single Sign-On
-
Turn on Enable Single Sign-On
-
It might be necessary to turn on Ignore Certificate Issues if the AD FS server is using a self-signed certificate
-
Turn off Load User Profile because AD FS 2016 and newer do not yet support calling the “/userinfo” endpoint
-
Authority should point to your AD FS URL. You can compose the URL by appending “/adfs“ to the AD FS server’s fully qualified domain name (FQDN for short)
-
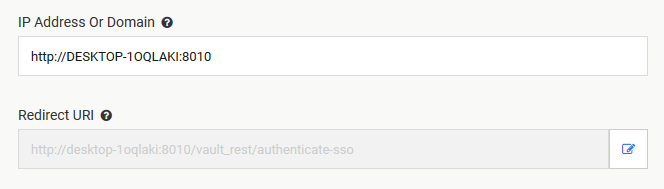
IP Address or Domain should point to the location of your Vault instance. Once you fill this information, Vault will automatically generate the Redirect URI
-
Copy the Redirect URI and go back to the AD FS Application Settings and paste it (step 5)
-
-
Add the copied URI to the list of known redirect endpoints and save the Client Identifier for later use
-
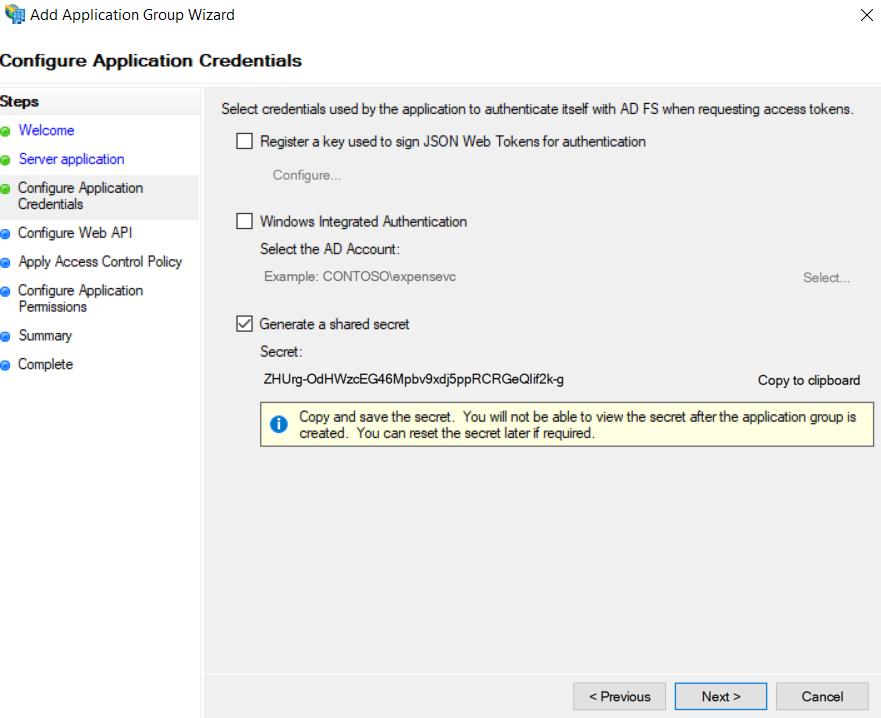
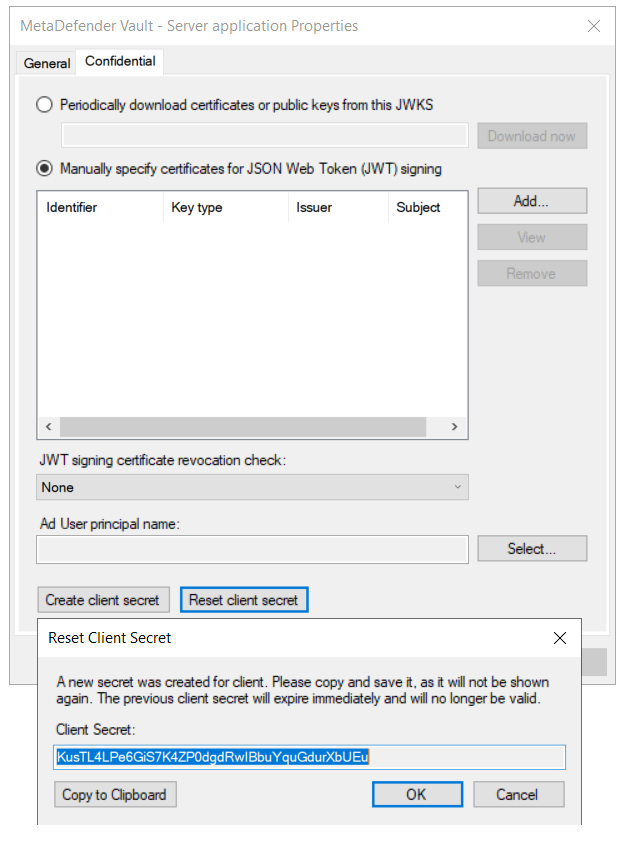
We will require a client secret, so select the Generate a shared secret action and copy the generated GUID for later use
-
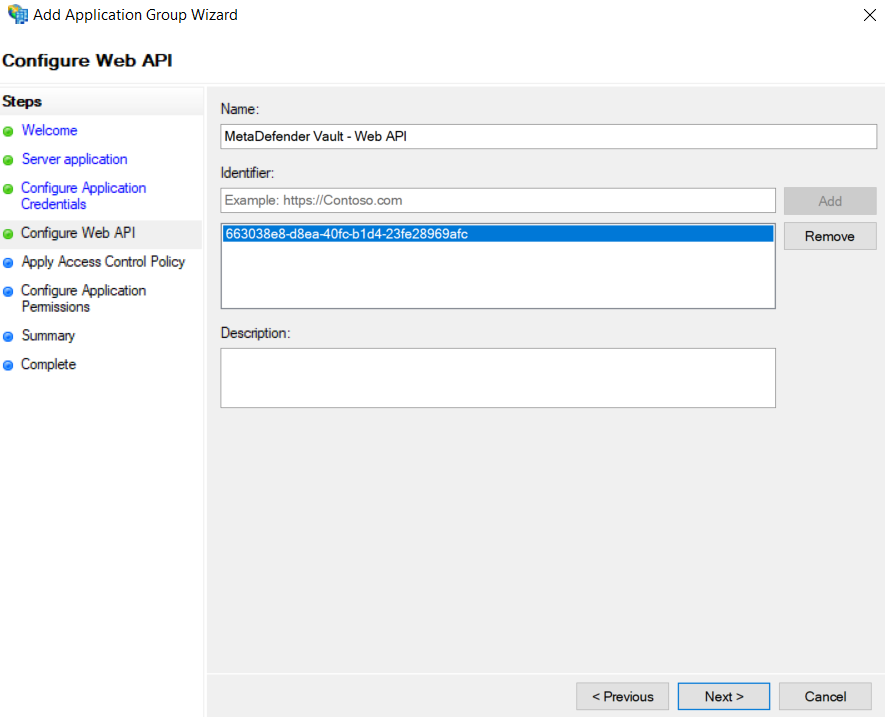
Add the client identifier (generated at step 5) to the list of known clients
-
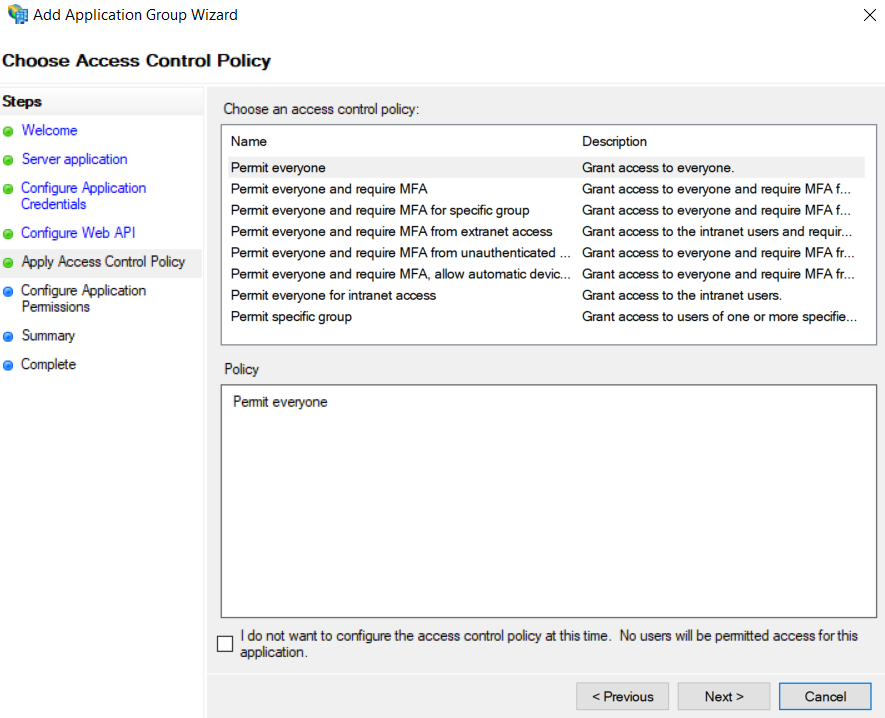
Choose which users will be allowed to authenticate.
For the purpose of this tutorial we will be allowing everyone
-
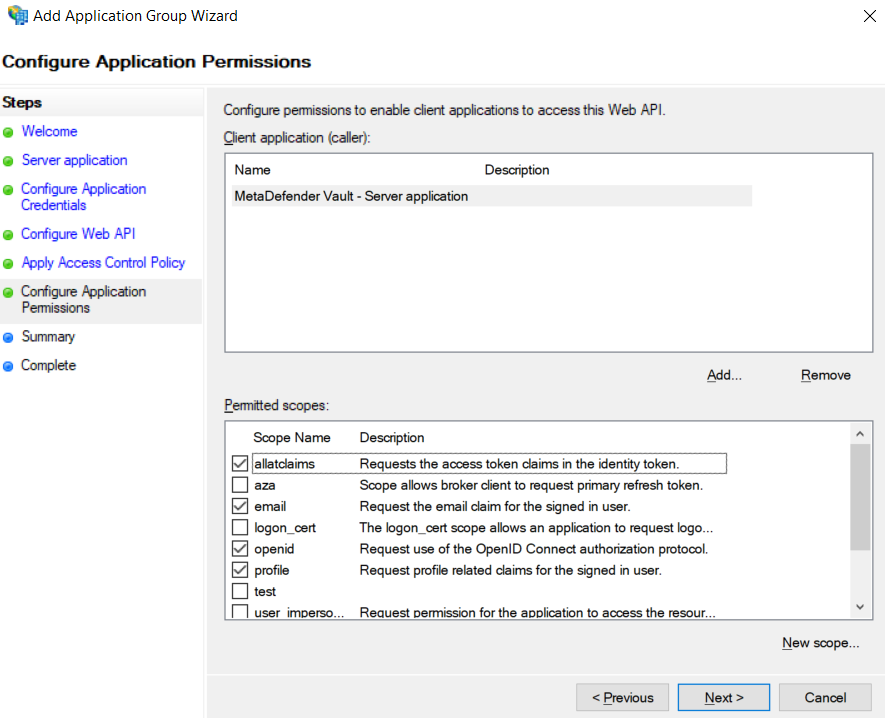
Last but not least we must configure the allowed scopes.
It is mandatory to select:-
openid → for enabling the OpenID Connect protocol
-
profile → to receive the user’s name related claims (upn, display_name, first_name, last_name)
-
email → to receive the user’s email claim (necessary for administrator role asignment)
-
allatclaims → to allow the profile and email related claims to be contained in the identity token, since AD FS does not allow loading profile related claims from the userinfo endpoint
-
-
After the above setup is complete, the newly created application group should be displayed in the application groups list
-
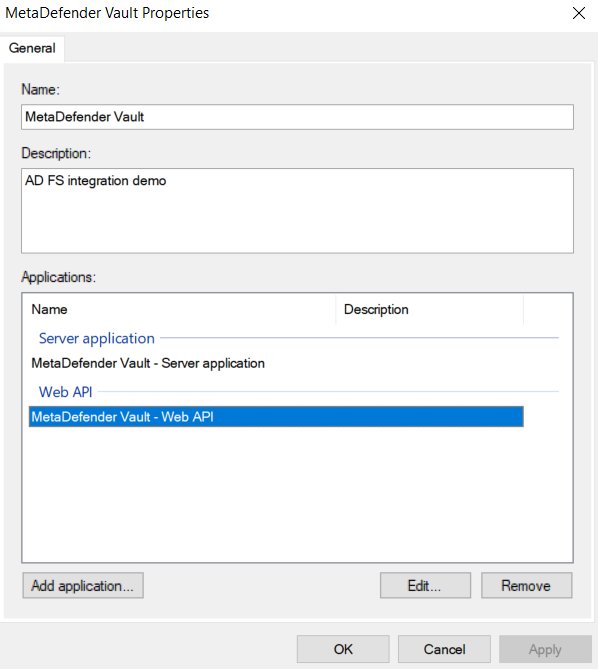
There is just one more step to complete on the AD FS server side, attribute to claim mapping.
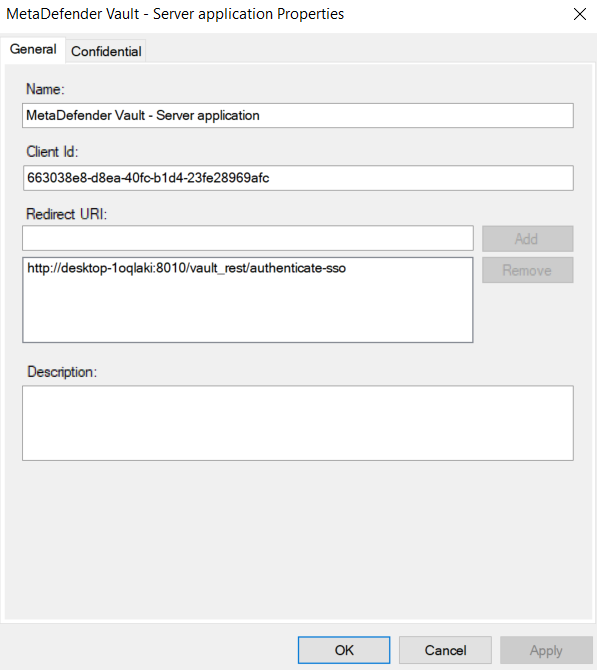
Double click the newly created application group and edit the Web API
-
Navigate to the Issuance Transform Rules tab and click Add Rule…
-
Select the Send LDAP Attributes as Claims template and click Next
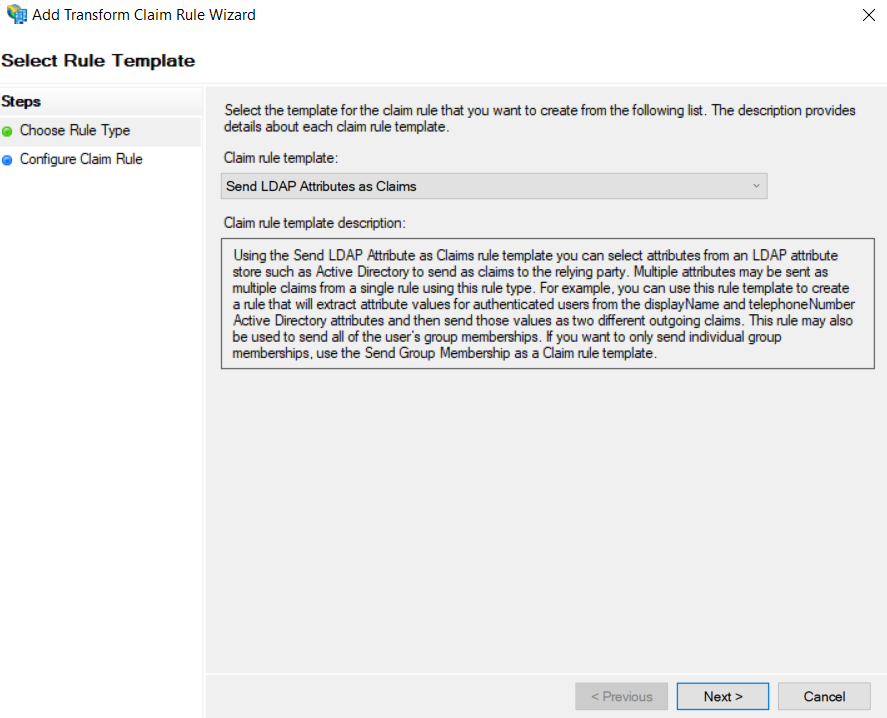
-
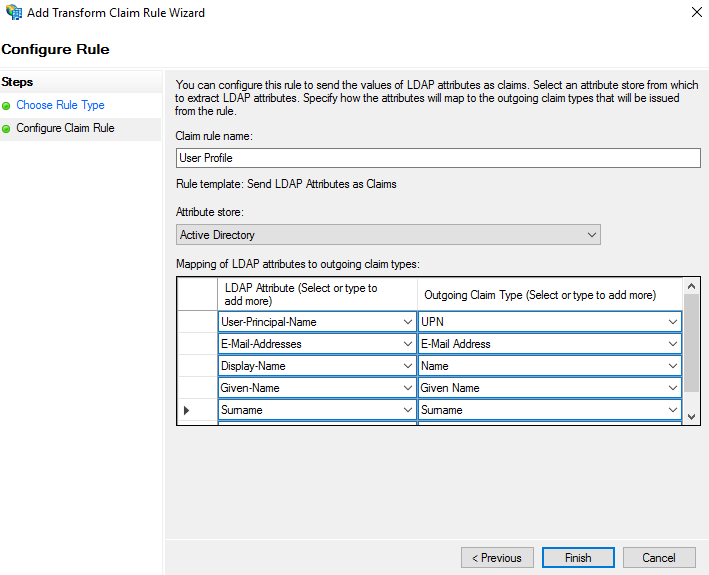
Select Active Directory as an Attribute store and create the following mappings.
MetaDefender Vault recognizes the following claims:-
upn (required)
-
email (required)
-
name (optional)
-
given_name (optional)
-
family_name (optional)
-
-
Click Finish and Apply
-
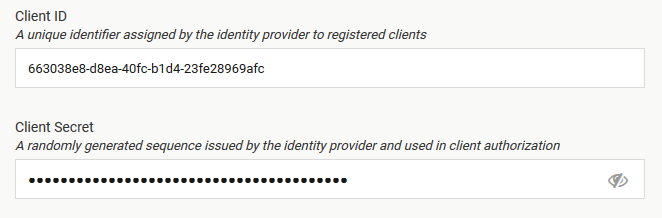
On Vault’s side, input the Client ID (created at step 5) and Client Secret (created at step 6)
-
In case of misplacement, the Client ID and Client Secret can be fetched by accessing the application group’s affiliated server application
-
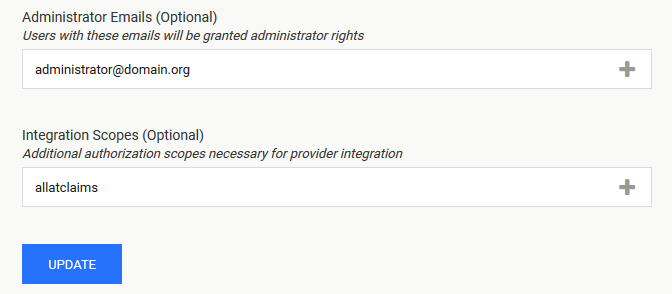
Add relevant Administrator Emails to select which users should be granted administrator rights
and add the allatclaims scope to Integration Scopes
-
If everything is ready, click Update.
-
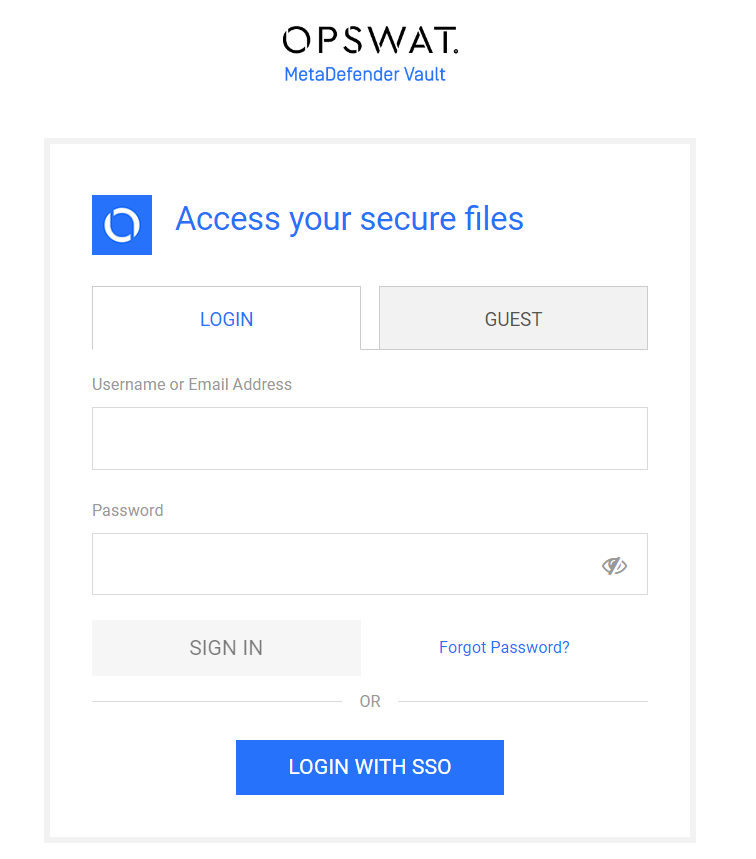
Log out of MetaDefender Vault
-
You will notice that there is a new LOGIN WITH SSO button on the login page
-
Click LOGIN WITH SSO. You should be redirected to Okta to login. Once logged in, you will be redirected back to MetaDefender Vault and automatically logged in.