4.2.2. Instances
Instances can be managed under Groups menu.
Adding instances
Please note that Metadefender Core instances before v4.7.0 can only be managed by Metadefender Central Management that has been upgraded from a version before v5.0.0.
To manage different versions of Metadefender Core v4 under the same group, an instance of the oldest version should be added first.
-
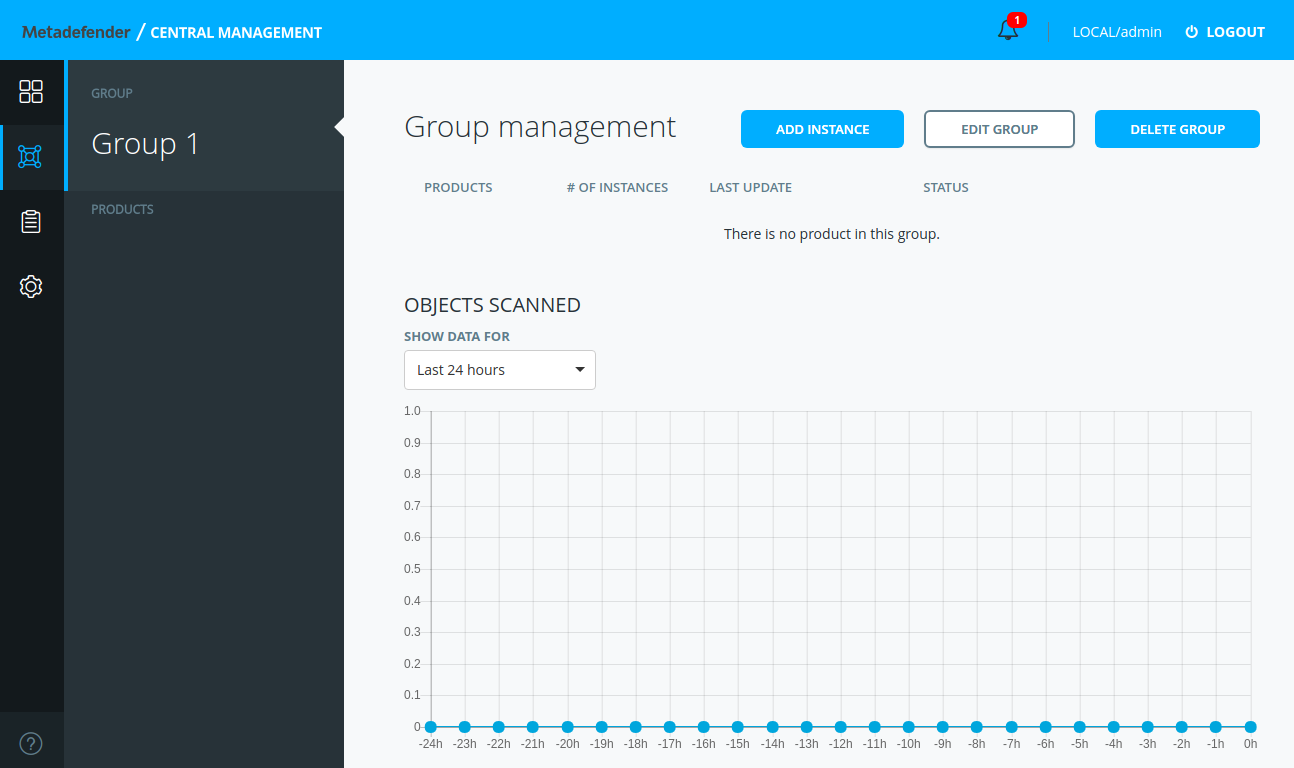
Under Groups menu choose the group you intend to add the new instance to. Group management page appears. Click on Add instance button.
-
Fill the Add new instance form. Name, rest address and either username and password or api key are mandatory. Note that credentials should belong to a user with administrator role.
Also note that If the instance to be added is the first of its own type in the group, its configuration can be imported by choosing Import configuration option on the bottom of the form.
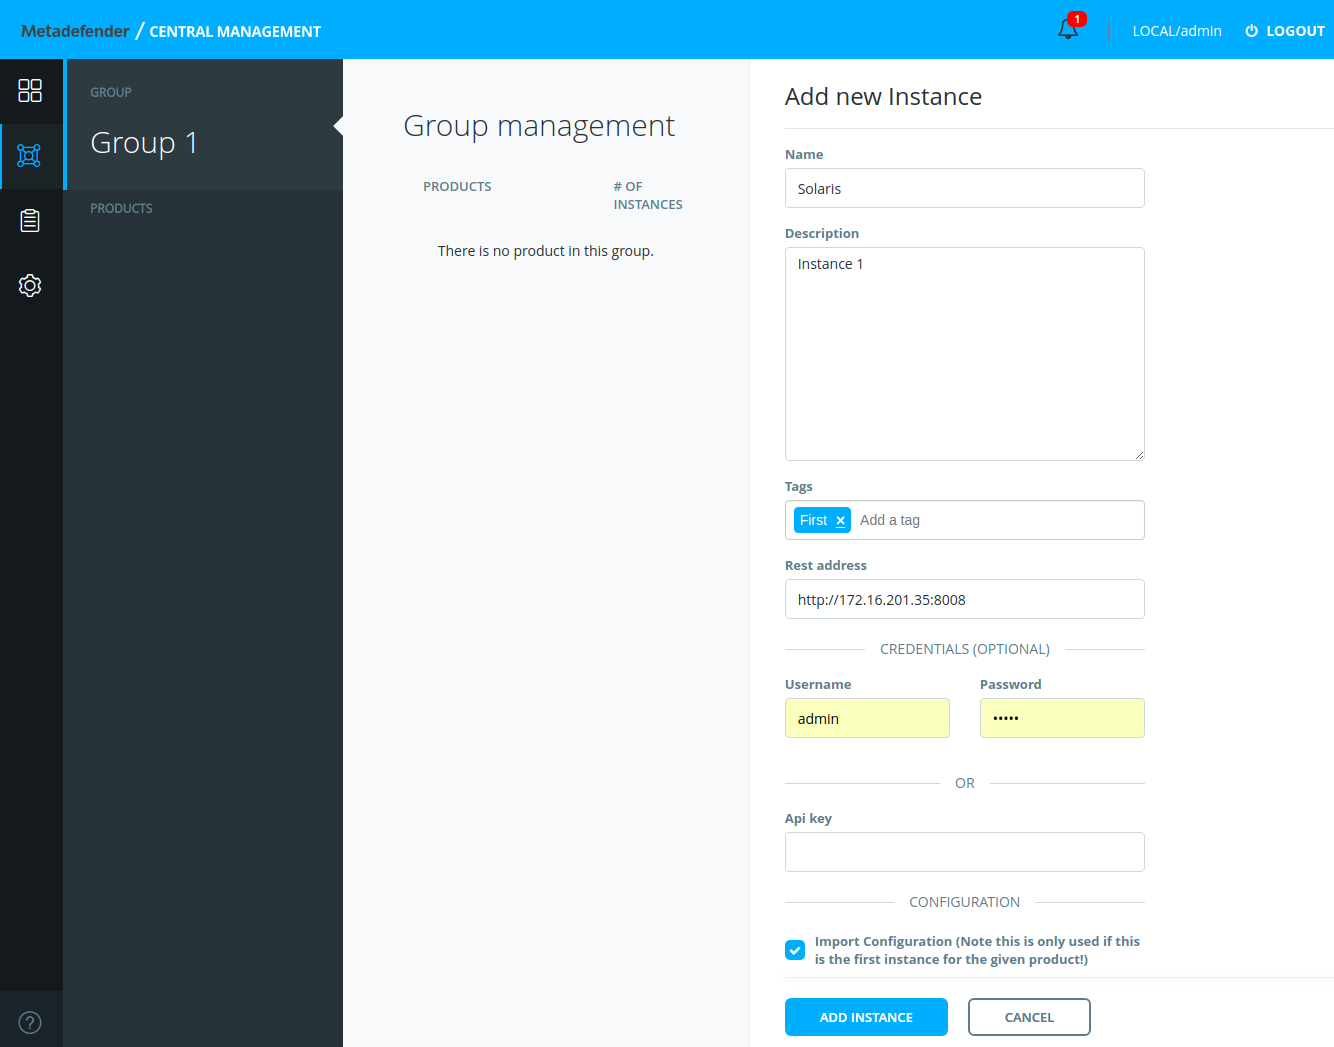
Note that the first instance of a product should be licensed and configured before adding to Metadefender Central Management, otherwise security rules won't work properly and product and its instances should be removed and added again after fixing the configuration of the instance.
-
Clicking on Add instance button it takes you to the Group management page.
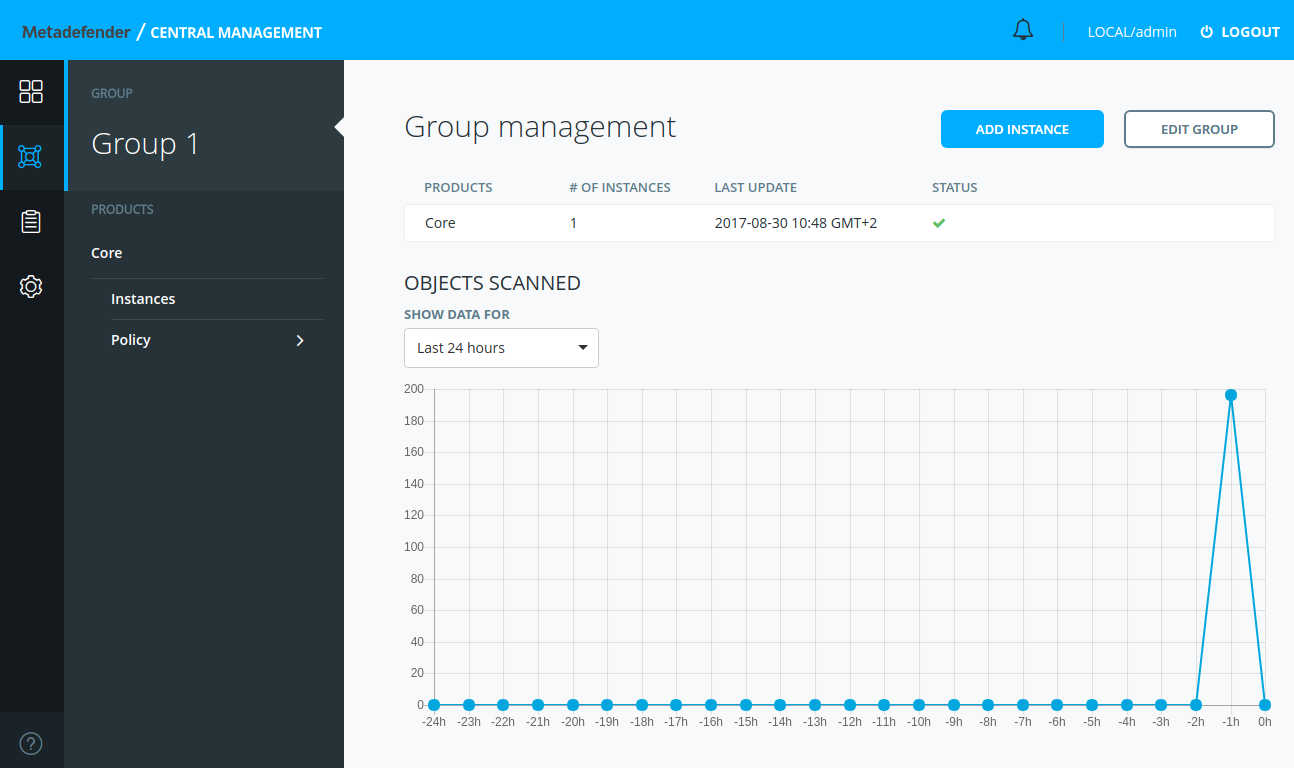 Under Products the product type of the added instance appears.
Managing instances
There are two ways to the Instances pages. One is selecting the desired group and clicking the product on the Group management page that has the instance you intend to manage. The other one is selecting the desired group and choosing the Instances submenu of the product (for example: Groups > Group 1 > Core > Instances).
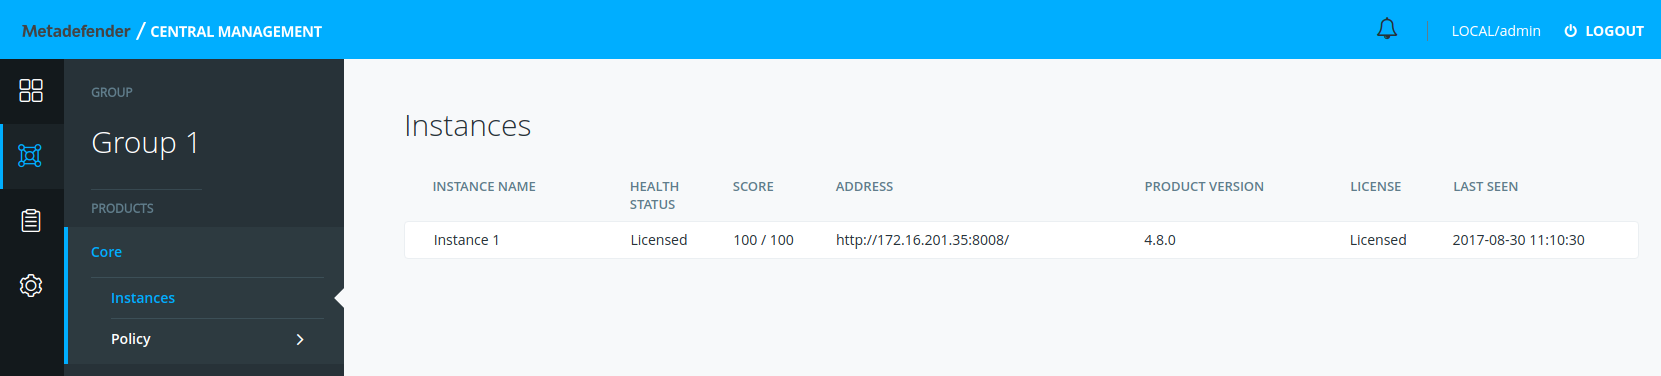
On the Instances page the list of instances displayed with the following details:
-
Instance name
-
Health status
-
Score
-
Address
-
Product version
-
License
-
Last seen
To see available operations, hover your cursor over an instance. Three pictos appear at the end of the row:
-
"i": details,
-
pencil: edit,
-
bin: remove.

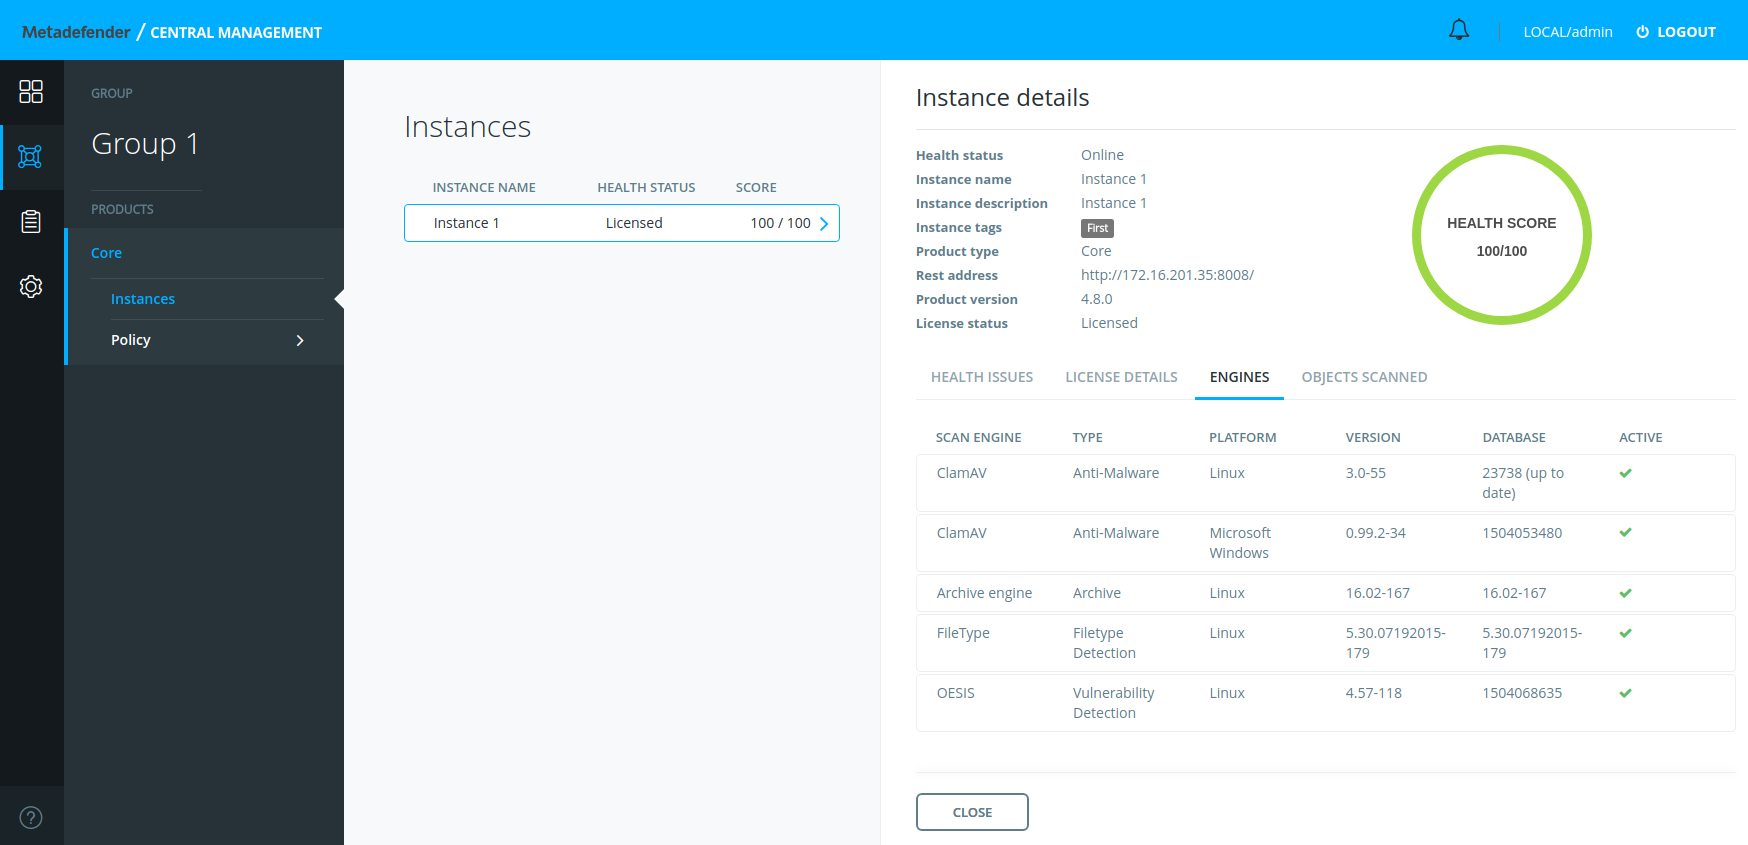
Instance details
Clicking on an instance, detailed information page appears. On the top of Instance details page general information is displayed. There are 4 tabs in the lower half of the page.
-
Health issues: It shows any issue that the instance has.
-
License details: Except activation key it shows the same information as the License information page of the instance.
-
Engines: All engines installed on the instance are listed with their details such as:
-
Name of engine
-
Type of engine
-
Platform the engine runs on
-
Engine version
-
Version of database the engine is currently using
-
Engine status (Active/Non-Active)
-
-
Objects scanned: This tab displays a graph of number of scanned objects in the last time period adjusted in the Show data for field.